Lemon Raspberry Cake Recipe
I still remember the first time I baked this lemon raspberry cake, and it wasn’t for a big holiday, but just because I wanted something bright and cheerful on the table. The fresh lemon flavor mixed with juicy raspberries made the whole kitchen smell amazing. I shared it with friends who came over for coffee, and everyone kept asking for seconds.
The balance of tangy citrus and sweet berries is the kind of flavor combination that makes a cake feel extra special. If you love fruity desserts, this one will win your heart. And if you’re curious to try more raspberry inspired treats, you’ll definitely want to check out the White Chocolate Raspberry Dream Cake too.
Why You’ll Love This Lemon Raspberry Cake
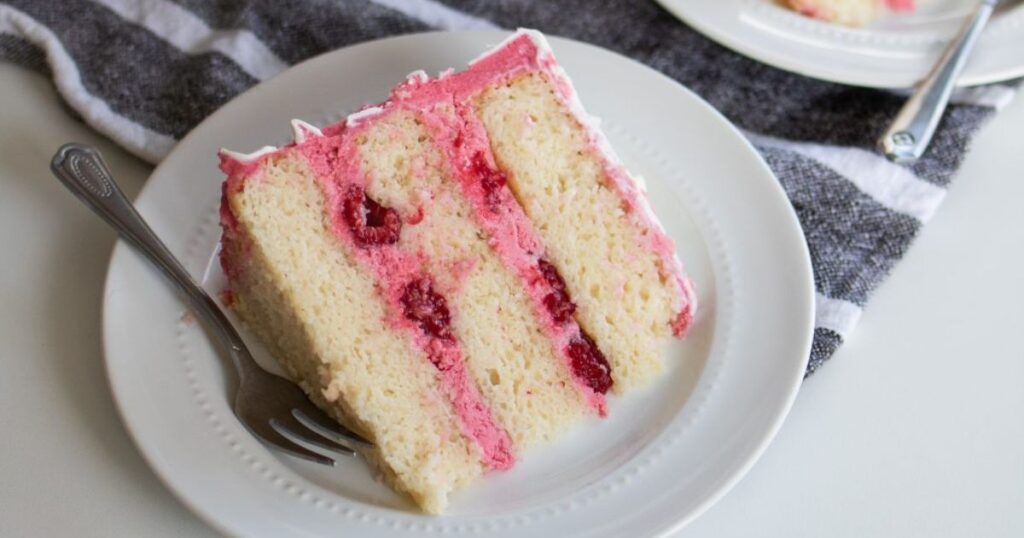
There’s something about lemon and raspberry together that feels refreshing and comforting at the same time. The sponge layers are soft and tender, the raspberries give little bursts of flavor in every bite, and the cream filling ties everything together with a smooth tangy sweetness. It’s not too heavy, which makes it just right for warm-weather gatherings or even an afternoon snack with tea. Best of all, it looks like something from a bakery, but you can make it right at home with simple ingredients.
Ingredients You’ll Need
For the Cake
- 2 ½ cups all-purpose flour
- 2 ½ tsp baking powder
- ½ tsp baking soda
- ½ tsp salt
- 1 cup unsalted butter, softened
- 1 ¾ cups granulated sugar
- 4 large eggs, room temperature
- 1 tbsp lemon zest
- 3 tbsp fresh lemon juice
- 1 tsp vanilla extract
- 1 cup buttermilk
- 1 ½ cups fresh raspberries
For the Cream Filling
- 8 oz cream cheese, softened
- ½ cup unsalted butter, softened
- 3 cups powdered sugar
- 1 tsp vanilla extract
- 1 tbsp lemon juice
For Garnish
- Fresh raspberries
- Lemon slices or zest curls
- Powdered sugar for dusting
Step-by-Step Instructions
Step 1: Prepare the Cake Pans
Preheat your oven to 350°F (175°C). Grease and flour two 9-inch round cake pans or line them with parchment paper. Preparing pans properly makes all the difference nobody likes when cake sticks to the bottom. Taking a few minutes here saves frustration later.
Step 2: Mix the Dry Ingredients
In a medium bowl, whisk together flour, baking powder, baking soda and salt. Whisking helps distribute everything evenly, so you don’t end up with one part of the cake rising higher than another. It’s a small step but important for a consistent bake.
Step 3: Cream Butter and Sugar
In a large mixing bowl, beat softened butter with sugar until it becomes light and fluffy. This takes about 3-4 minutes. Don’t rush this step, creaming butter and sugar introduces air into the mixture, which creates a soft, tender cake texture.
Step 4: Add Eggs and Flavorings
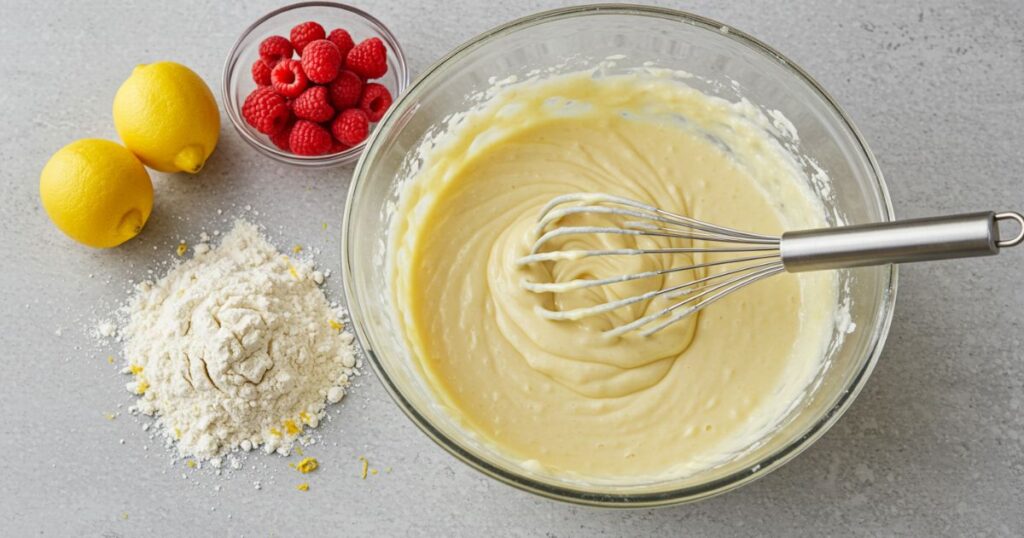
Add eggs one at a time mixing after each addition. Then stir in lemon zest, lemon juice, and vanilla extract. You’ll notice the batter turning fragrant with a citrusy aroma that already hints at how refreshing the cake will taste.
Step 5: Alternate Dry and Wet Ingredients
Add the dry mixture in three additions, alternating with buttermilk. Start and finish with the dry mix. This alternating method prevents overmixing and ensures the batter stays smooth. Stir gently, overworking the batter can lead to dense layers instead of light and fluffy ones.
Step 6: Fold in Raspberries
Toss the raspberries in a little flour and then gently fold them into the batter. Coating them helps keep them from sinking while baking. This way, you’ll have raspberries scattered throughout the cake instead of all bunched at the bottom.
Step 7: Bake the Layers
Divide batter between pans and smooth the tops. Bake for 25-30 minutes, until a toothpick inserted in the center comes out clean. Let cakes cool in their pans for 10 minutes before moving them to a wire rack. Cooling properly keeps layers from breaking apart when handled.
Step 8: Make the Cream Filling
Beat cream cheese and butter together until creamy. Slowly add powdered sugar until smooth, then mix in vanilla and lemon juice. The result is a frosting that’s slightly tangy with just enough sweetness to balance the cake.
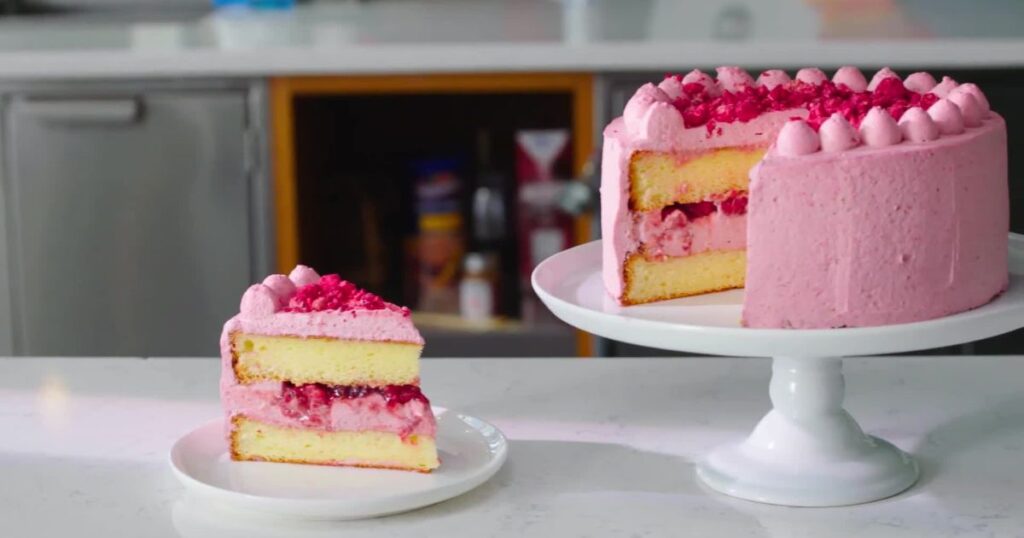
Step 9: Assemble the Cake
Place the first layer on a serving plate. Spread a generous amount of cream filling, then scatter a few fresh raspberries on top. Add the second cake layer and cover the whole cake with the remaining filling. Smooth the sides or leave them rustic it looks lovely either way.
Step 10: Garnish and Chill
Decorate with raspberries and lemon slices or zest curls. A light dusting of powdered sugar adds a bakery-style finish. For best results, chill the cake for 30 minutes before serving. This sets the filling and makes slicing neater.
Variations to Try
- Berry Medley: Mix in blueberries or blackberries with the raspberries for a colorful twist.
- Glazed Top: Swap cream filling for a lemon glaze if you prefer a lighter option.
- Cupcake Version: Divide the batter into cupcake tins for individual lemon raspberry treats.
- Extra Tang: Add more lemon zest to the frosting for a sharper citrus bite.
- Layer Boost: Turn it into a three-layer cake by dividing the batter into smaller pans.
Serving Suggestions
This cake makes a cheerful centerpiece for birthdays, bridal showers, or spring gatherings. Serve each slice with tea, coffee, or sparkling lemonade for a refreshing pairing. In summer I like to add a scoop of vanilla ice cream on the side, which makes the whole dessert feel extra indulgent.
Storage Tips
- Room Temperature: Store covered for up to 2 days if it’s cool in your kitchen.
- Refrigerator: Keeps well in an airtight container for up to 5 days. Let it sit out before serving so the frosting softens.
- Freezer: Wrap slices in plastic and foil, freeze for up to 2 months, and thaw overnight in the fridge.
FAQs
Q1: Can I use frozen raspberries?
Yes, but don’t thaw them first. Add them directly to the batter to avoid excess liquid.
Q2: What if I don’t have buttermilk?
Stir 1 tbsp of lemon juice into 1 cup of milk and let it sit for 5 minutes. It works as a quick substitute.
Q3: Can I make it as a sheet cake?
Definitely. Bake in a 9×13-inch pan for 35-40 minutes and adjust frosting as needed.
Q4: How do I prevent a dry cake?
Avoid overbaking and measure flour carefully by spooning it into the cup and leveling it off.
Q5: Can I prepare it ahead?
Yes. Bake layers one day before, wrap tightly, and frost the next day for best results.
Final Thoughts
This lemon raspberry cake is one of those desserts that always feels like a celebration, even if it’s just for a quiet afternoon at home. The lemon keeps it fresh, the raspberries make it lively, and the cream filling ties everything together. Once you try it, you’ll see why it’s a recipe worth keeping in your regular baking rotation.