Italian Nut Roll Cookies With Sweet Walnut Filling
Italian Nut Roll Cookies are a classic treat that brings comfort with every bite. These cookies have a soft dough that wraps around a sweet nut filling. When baked, they turn lightly golden on the outside while staying tender inside. Each slice shows a beautiful swirl of dough and nuts that looks just as good as it tastes.
These cookies are often made during the holidays, but they are too good to save for just one season. I like to bake them on quiet weekends or when family comes over. They pair well with coffee, tea, or a cold glass of milk. If you enjoy Italian-style cookies, you may also like Ricotta Almond Cookies or Italian Cannoli Cookies. They share the same cozy feeling and simple ingredients.
This recipe keeps things traditional and easy. You do not need special tools or hard steps. Just patience and a little care.

What Makes Italian Nut Roll Cookies Special
These cookies stand out because of their texture. The dough is soft and easy to work with. It rolls without cracking and bakes into a gentle crumb that melts in your mouth.
The filling is another reason people love them. Groundnuts mixed with sugar and milk create a rich center that is sweet but not heavy. As the cookies bake, the filling firms up just enough to slice clean while staying moist.
Italian Nut Roll Cookies are also flexible. You can change the nuts, adjust the sweetness, or add light flavor touches. No matter how you make them, they always feel homemade and comforting.
Ingredients You Will Need
For the Dough
- All-purpose flour
- Unsalted butter softened
- Granulated sugar
- Eggs
- Milk
- Vanilla extract
- Baking powder
- Salt
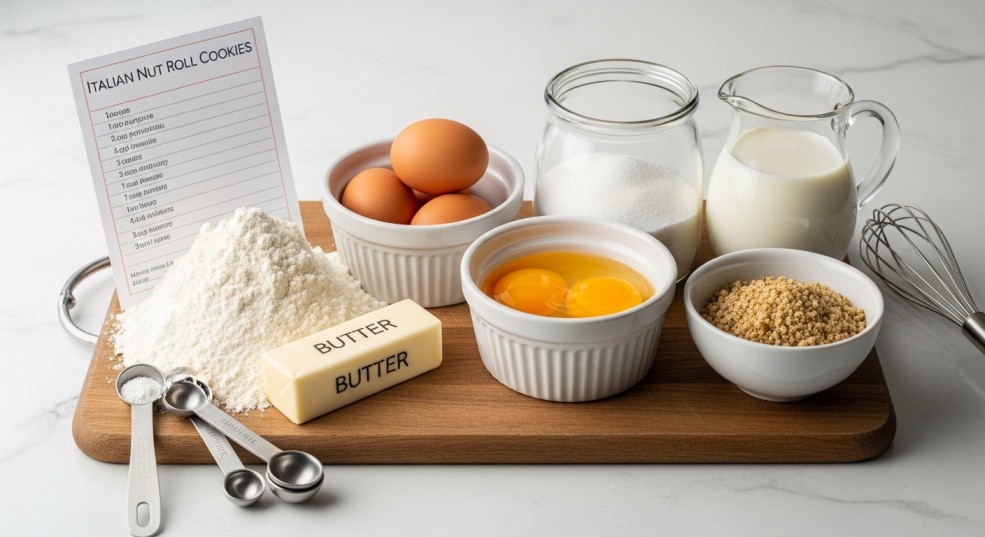
For the Nut Filling
- Finely ground walnuts or almonds
- Granulated sugar
- Milk
- Vanilla extract
- A pinch of salt
These ingredients work together to create cookies that are soft on the outside with a rich nut center.
Step-by-Step Instructions
Step 1: Prepare the dough base
In a large bowl, add softened butter and sugar. Mix until the mixture looks light and smooth. This takes about two minutes. Add the eggs one at a time and mix well after each one. Stir in the milk and vanilla. The mixture should look creamy and smooth.
Step 2: Add dry ingredients
In a separate bowl, mix flour, baking powder, and salt. Slowly add the dry mixture into the wet ingredients. Stir gently until a soft dough forms. The dough should feel smooth and slightly soft but not sticky.
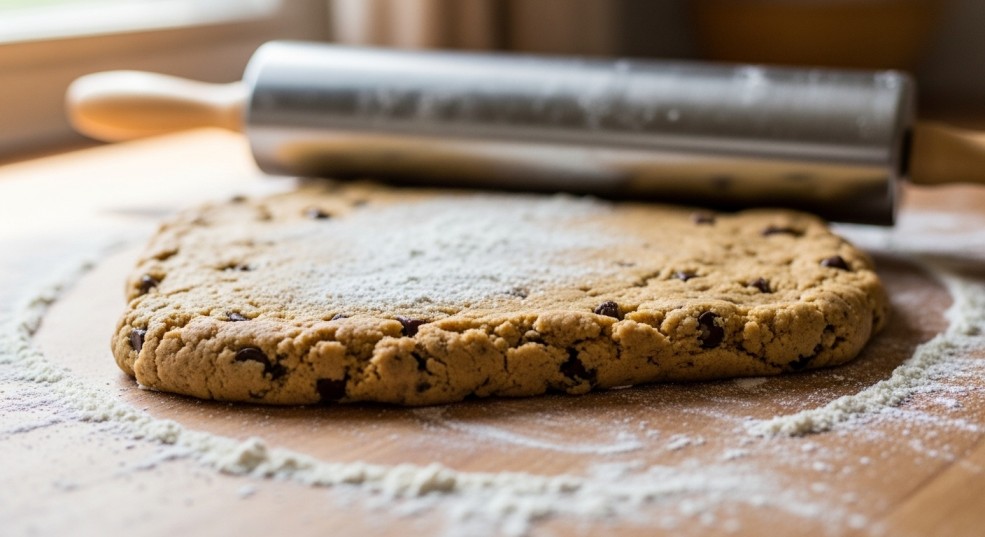
Step 3: Chill the dough
Cover the bowl and place the dough in the fridge for about thirty minutes. This step makes the dough easier to roll and helps the cookies hold their shape.
Step 4: Make the nut filling
In a medium bowl, combine ground nuts, sugar, milk, vanilla, and salt. Stir until the mixture looks thick and spreadable. It should not be runny. If it feels dry, add a small splash of milk.
Step 5: Roll out the dough
Remove the dough from the fridge. Divide it into two equal pieces. Lightly flour your work surface. Roll one piece of dough into a rectangle about one quarter inch thick. Try to keep the edges even.
Step 6: Spread the filling
Spread half of the nut filling evenly over the dough. Leave a small border along the edges. Use a spatula to spread gently so the dough does not tear.
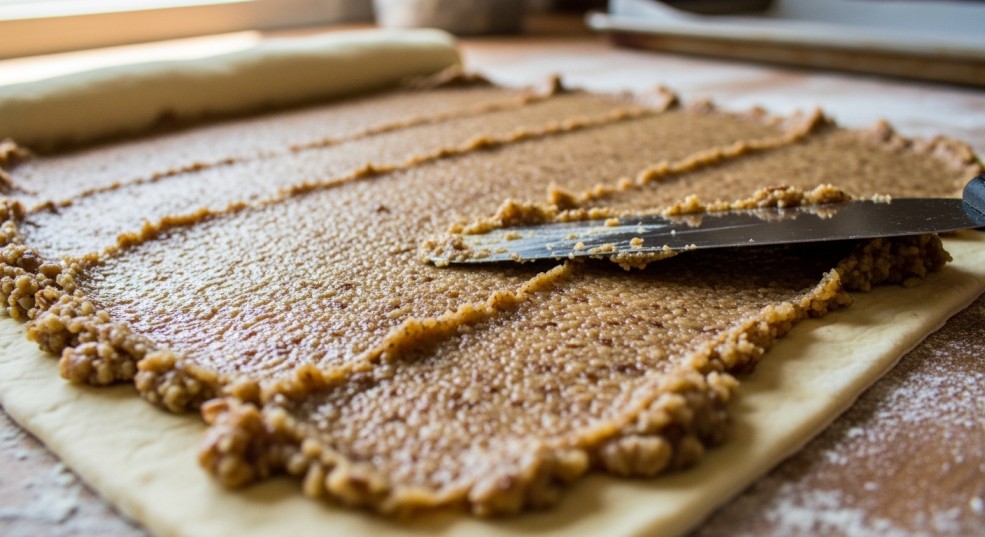
Step 7: Roll the dough
Starting from the long side, roll the dough tightly into a log. Use slow steady movements. Pinch the seam gently to seal. Place the roll seam side down on a lined baking sheet. Repeat with the second piece of dough.
Step 8: Chill the rolls again
Place the rolled logs in the fridge for twenty minutes. This helps them slice clean and bake evenly.
Step 9: Slice the cookies
Using a sharp knife, slice each log into even pieces about one inch thick. Place the slices flat on the baking sheet with space between them.
Step 10: Bake the cookies
Bake until the bottoms are lightly golden and the tops feel set. The cookies should stay pale on top with a soft texture. Remove from the oven and let them cool on the pan for a few minutes before moving.
Step 11: Cool fully before serving
Move the cookies to a wire rack and let them cool completely. The filling will firm up as they cool, making the swirl more defined.
Helpful Tips For Best Results
- Use finely ground nuts for a smooth filling.
- Do not overfill, or the rolls may open.
- Chill the dough when needed for clean slices.
- Slice with a sharp knife for neat edges.
These simple tips help the cookies look and taste their best.
How To Store Italian Nut Roll Cookies
Store the cookies in an airtight container at room temperature for up to four days. They stay soft and flavorful.
For longer storage, place them in the fridge for up to one week. You can also freeze them for one month. Let frozen cookies thaw at room temperature before serving.
Variations You Can Try
- Use almonds or hazelnuts instead of walnuts.
- Add a small pinch of cinnamon to the filling.
- Drizzle cooled cookies with a light sugar glaze.
- Dust with powdered sugar before serving.
Each change keeps the cookie familiar while adding something new.
Frequently Asked Questions
Can I make the dough ahead of time?
Yes. The dough can be made one day ahead and kept in the fridge.
Why did my rolls crack?
This happens if the dough is too cold or rolled too thin. Let it soften slightly before rolling.
Can I use store-ground nuts?
Yes, just make sure they are finely ground and fresh.
Are these cookies very sweet?
They are balanced. The dough is mild and the filling adds gentle sweetness.
A Cookie That Feels Like Home
Italian Nut Roll Cookies are the kind of treat that brings people together. They are simple, warm, and full of tradition. The soft dough and nut filling make each bite comforting and familiar. Whether you bake them for holidays or quiet afternoons, they always feel special.
If you enjoy classic Italian cookies with rich flavor and soft texture, this recipe is one you will come back to again and again.