Chocolate Swiss Rolls Recipe | A Classic Dessert with a Twist
I’ve always had a soft spot for desserts that look fancy but are surprisingly easy to make, and chocolate Swiss rolls fit right into that category. The light, airy chocolate sponge filled with creamy whipped frosting is the kind of dessert that brings joy to both kids and adults. It’s the type of cake that impresses at gatherings but also feels comforting with a cup of coffee at home.

If you’ve ever enjoyed layered chocolate cakes like a German Chocolate Cake, you’ll love how this Swiss roll combines the same rich chocolate flavor in a different form. This dessert is soft, indulgent, and so fun to slice into revealing that beautiful swirl inside.
Why You’ll Love Chocolate Swiss Rolls
There are so many reasons to love these cakes. They look elegant yet are surprisingly easy once you learn the rolling trick. The sponge is soft and moist with a delicate chocolate flavor that pairs wonderfully with creamy fillings. They’re also versatile you can fill them with whipped cream, chocolate ganache, or even fruit spreads for variety.
Another reason to love them is their portion size. Each slice feels special with its swirl of frosting, so they’re perfect for serving at parties, holiday tables, or just for a sweet treat at home. Plus, they store well so you can make them ahead of time.
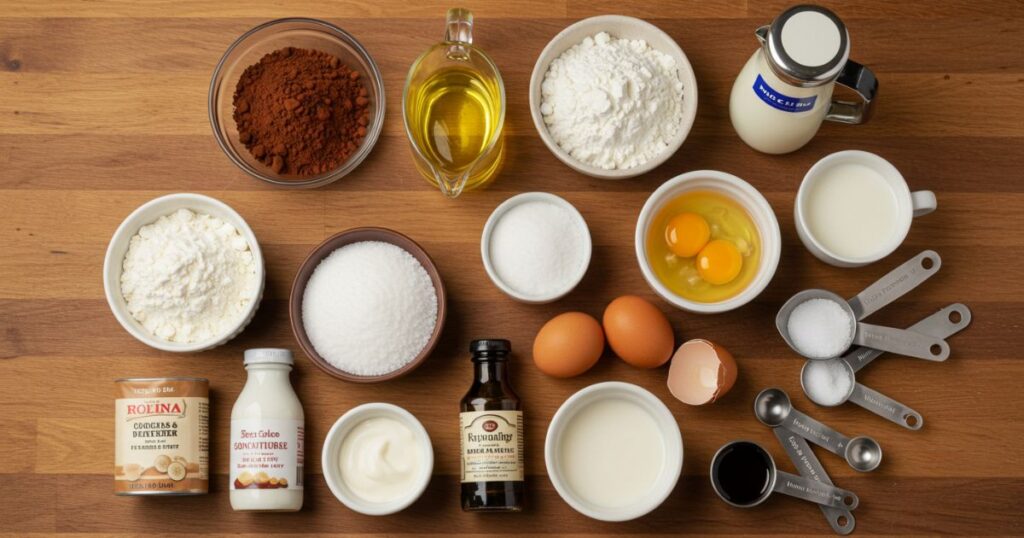
Ingredients for Chocolate Swiss Rolls
Here’s everything you’ll need to make your swiss roll from scratch:
For the Cake:
- ¾ cup all-purpose flour
- ½ cup unsweetened cocoa powder
- 1 teaspoon baking powder
- ¼ teaspoon salt
- 4 large eggs (room temperature)
- ¾ cup granulated sugar
- 1 teaspoon vanilla extract
- 2 tablespoons vegetable oil
- 2 tablespoons whole milk
For the Filling:
- 1 cup heavy cream (chilled)
- ¼ cup powdered sugar
- 1 teaspoon vanilla extract
For the Chocolate Ganache Topping (optional):
- ½ cup semi-sweet chocolate chips
- ½ cup heavy cream
Step-by-Step Instructions for Making Chocolate Swiss Rolls
Step 1: Prepare the Pan and Oven
Preheat your oven to 350°F (175°C). Line a 10×15-inch jelly roll pan with parchment paper, leaving some overhang on the sides for easy lifting later. Lightly grease the parchment with butter or nonstick spray. This step is crucial because the cake is delicate, and you don’t want it sticking.
Step 2: Mix the Dry Ingredients
In a medium bowl, sift together the flour, cocoa powder, baking powder, and salt. Sifting helps remove lumps and keeps the batter light and airy, which is key for a sponge cake.
Step 3: Beat the Eggs and Sugar
In a large bowl, beat the eggs with an electric mixer on high speed until pale and fluffy—this usually takes 3–5 minutes. Gradually add the granulated sugar and continue beating until the mixture thickens and falls in ribbons when lifted. This aeration will give your sponge its soft texture.

Step 4: Add Vanilla, Oil, and Milk
Mix in the vanilla extract, then gently fold in the vegetable oil and milk. The oil keeps the sponge moist while the milk adds tenderness. Be careful not to deflate the eggs as you fold.
Step 5: Combine Wet and Dry Ingredients
Slowly fold the dry mixture into the egg mixture in batches, using a spatula. Take your time here—the goal is to incorporate everything without knocking out the air you worked hard to whip into the eggs. The batter should be smooth and light.
Step 6: Bake the Sponge Cake
Pour the batter into the prepared pan and spread it evenly with a spatula. Bake for 10–12 minutes, or until the cake springs back when lightly touched. Don’t overbake, or the sponge will be dry and harder to roll.
Step 7: Roll the Cake While Warm
This is the trickiest but most rewarding part. As soon as the cake comes out of the oven, lift it out using the parchment and place it on a clean kitchen towel dusted with powdered sugar. Roll the cake up (with the towel inside) from the short side while it’s still warm. Let it cool completely in this rolled shape. Rolling while warm prevents cracks later.
Step 8: Make the Filling
While the cake cools, whip the heavy cream with powdered sugar and vanilla extract until stiff peaks form. Keep it chilled until ready to use. If you prefer, you can also use chocolate buttercream or even cream cheese frosting for variety.
Step 9: Assemble the Swiss Roll
Carefully unroll the cooled cake. Spread the whipped cream filling evenly across the surface, leaving a small border around the edges. Gently re-roll the cake, peeling away the towel as you go. Use the parchment paper to help keep the roll tight.
Step 10: Add Ganache (Optional)
If you want to make it extra decadent, prepare the chocolate ganache. Heat the heavy cream until just simmering, pour it over the chocolate chips, and stir until smooth. Let it cool slightly before pouring over the swiss roll. Spread it evenly for a glossy finish.
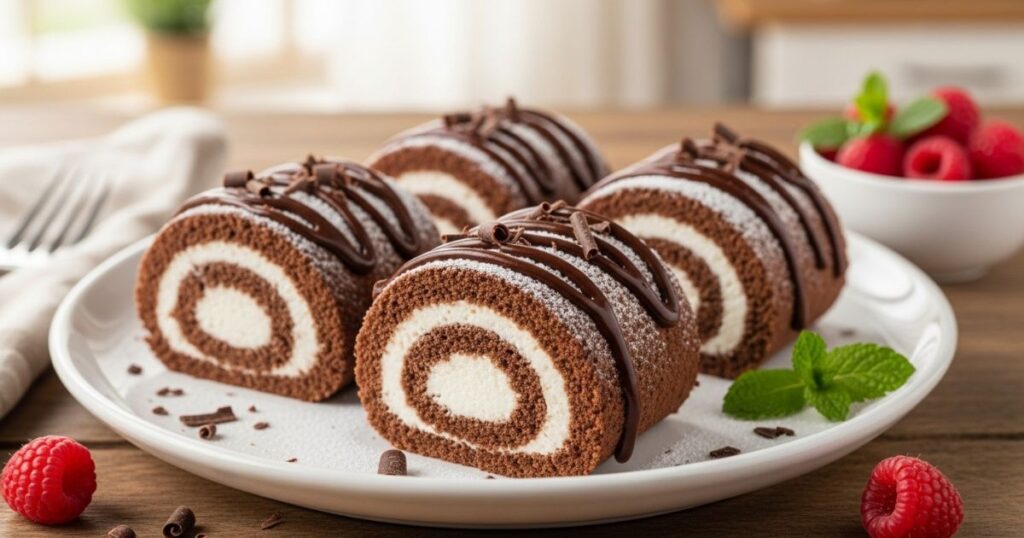
Step 11: Chill and Slice
Refrigerate the swiss roll for at least 30 minutes before slicing. This helps the filling set and makes slicing easier. When ready, use a sharp knife to cut even slices, revealing that beautiful swirl inside.
Tips for the Best Chocolate Swiss Rolls
- Don’t skip the rolling step: Rolling while warm is the secret to a crack-free swiss roll.
- Use fresh cream: Whipping cream that’s very cold creates the fluffiest filling.
- Avoid overbaking: A dry cake will crack when rolled, so check it early.
- Decorate as you like: Dust with powdered sugar, drizzle chocolate, or add fresh berries for a beautiful finish.
Variations
One of the best things about swiss rolls is how customizable they are. You can try:
- Mocha Swiss Roll: Add a teaspoon of espresso powder to the sponge for a coffee-chocolate flavor.
- Fruit-Filled Swiss Roll: Spread raspberry or strawberry jam under the whipped cream for a fruity twist.
- Holiday Style: Add peppermint extract to the cream filling and top with crushed candy canes.
Storing Chocolate Swiss Rolls
Keep the swiss roll refrigerated in an airtight container for up to 3 days. If you want to freeze it, wrap tightly in plastic wrap and then foil. Thaw overnight in the refrigerator before serving.
FAQs
Q: Can I make chocolate swiss rolls ahead of time?
Yes, you can prepare the cake and roll it (without filling), then store it wrapped until ready to assemble. Fill and decorate before serving.
Q: What if my cake cracks while rolling?
Don’t worry. You can cover cracks with frosting or ganache. It will still taste amazing.
Q: Can I use frosting instead of whipped cream?
Absolutely. Chocolate buttercream, cream cheese frosting, or even Nutella work beautifully.
Final Thoughts
Chocolate swiss rolls are one of those desserts that look bakery-worthy but can be made right in your kitchen. The soft sponge, creamy filling, and gorgeous swirl make every slice feel special. Once you try it, you’ll see how fun it is to roll, slice, and serve this treat. Whether you’re baking for a holiday, a party, or just a sweet craving, swiss rolls are always a hit.