

If you love quick and easy desserts, Oreo Truffles are a treat you need to try. I made these last weekend for a small family gathering and they were gone within minutes. These little bites look fancy but are so simple to make. All you need are Oreo cookies, cream cheese, and chocolate. They taste rich, smooth, and chocolatey with a crunchy cookie base inside. They also make a wonderful gift or party snack that you can prepare ahead of time.
If you have already tried my Chocolate Oreo Cake, then you will enjoy this recipe just as much. The flavors are similar, but these truffles are bite-sized and require no baking at all.
Why You’ll Love Oreo Truffles
Oreo Truffles are a favorite for many reasons. They are easy to make with just three ingredients, so you do not need a long list of supplies. The recipe is no bake, which saves you time in the kitchen. They are also versatile because you can decorate them in many ways. Drizzle white chocolate, add sprinkles, or even dip them in dark chocolate for a stronger flavor.
They also store very well. You can make a big batch, keep them in the fridge, and enjoy a quick treat whenever you want. If you’re someone who enjoys fun kitchen projects with kids, Oreo Truffles are perfect because they are safe, quick, and hands-on.
Ingredients You Need
- 36 Oreo cookies (regular, not double-stuffed)
- 8 ounces cream cheese, softened
- 12 ounces semi-sweet or white chocolate (melted)
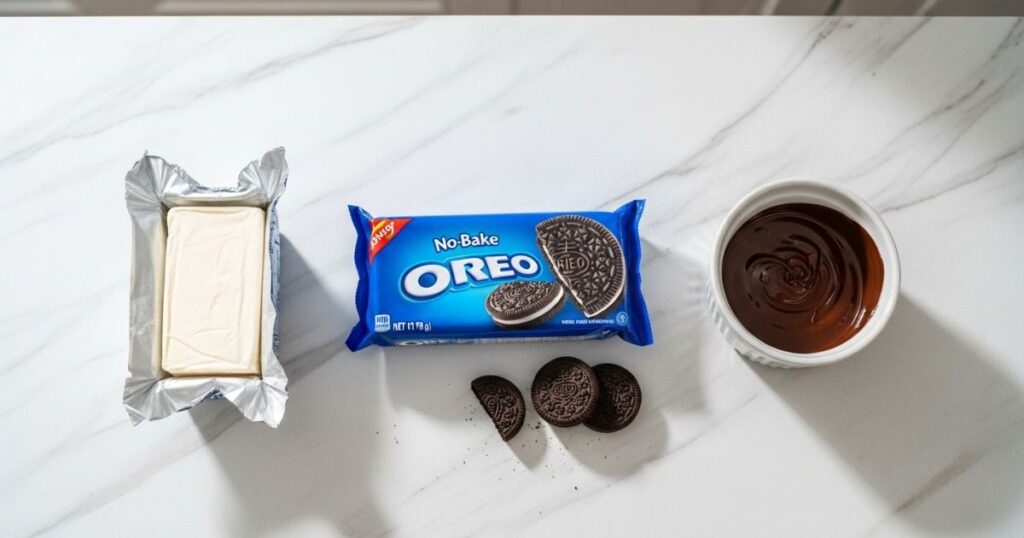
Optional for decoration: sprinkles, crushed Oreo crumbs, or melted white chocolate for drizzling
Step by Step Instructions
Step 1: Prepare the Oreos
Start by placing your Oreo cookies into a food processor. Blend until they become fine crumbs. If you do not have a processor, you can put the cookies in a zip-top bag and crush them with a rolling pin. This takes a little more effort, but it works just as well. Make sure they are crushed evenly, with no large chunks. The finer the crumbs, the smoother your truffle filling will be.
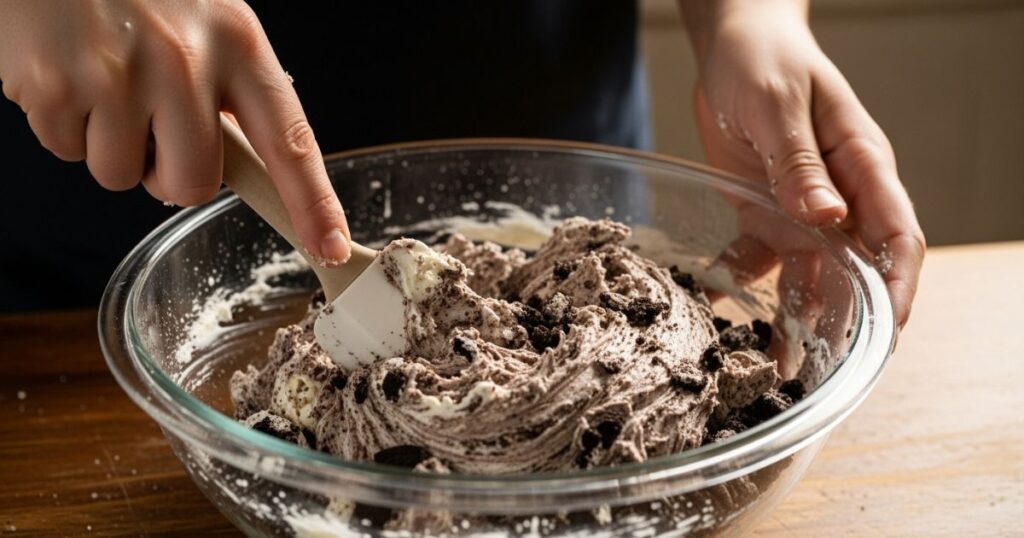
Step 2: Mix with Cream Cheese
Transfer the Oreo crumbs into a large mixing bowl. Add the softened cream cheese and mix until the texture becomes thick and smooth. The cream cheese should be fully combined with the cookie crumbs. If you want a clean mixture without lumps, make sure the cream cheese is at room temperature before you mix. You can use a spoon, spatula, or even your hands. I prefer using my hands because it blends faster and creates a smooth dough. This step is the base of the truffles, so take your time to get it right.
Step 3: Shape the Truffles
Scoop out small amounts of the dough and roll them into balls. Aim for about 1 inch in size, roughly the size of a walnut. If you want them to look neat, use a cookie scoop. Place the balls onto a baking sheet lined with parchment paper. Once you finish shaping, place the tray in the freezer for 15-20 minutes. This chilling step makes the truffles firm, which is important because it keeps them from falling apart when dipped in melted chocolate.
Step 4: Melt the Chocolate
While the truffles are chilling, prepare your chocolate. You can melt it in the microwave or use a double boiler on the stove. If you use the microwave, heat the chocolate in short bursts of 20-30 seconds, stirring each time until smooth. A double boiler works well too and prevents burning. Whichever method you choose, make sure the chocolate is glossy and smooth. If the chocolate is too hot, let it cool slightly so it does not melt the truffle filling.
Step 5: Dip and Decorate
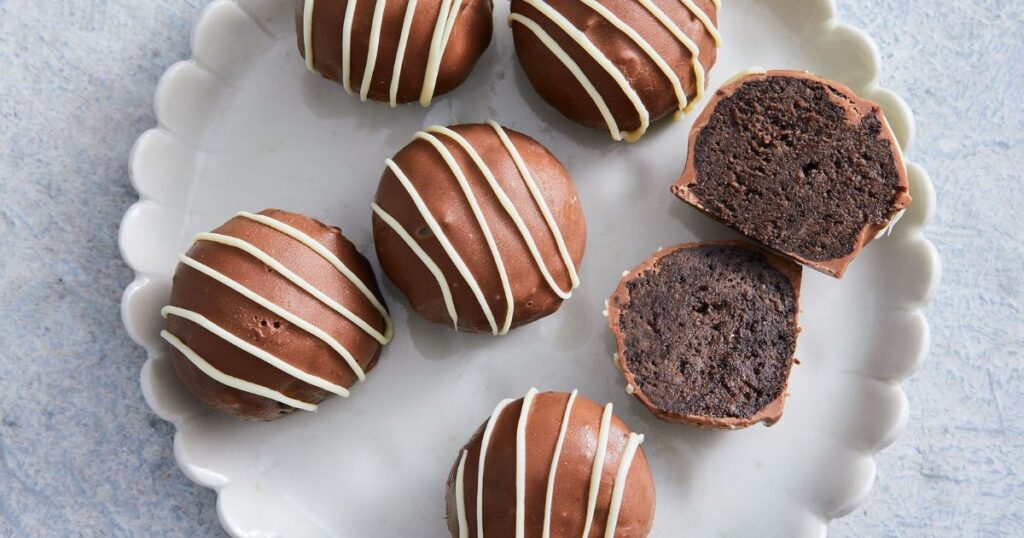
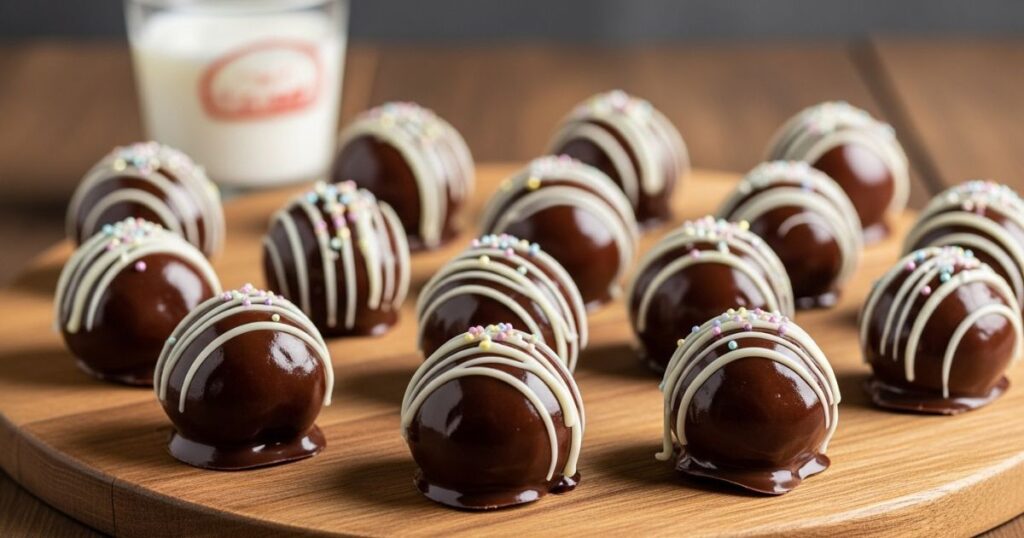
Take the chilled truffles out of the freezer. Using a fork, dip each truffle into the melted chocolate, turning it so it is fully coated. Let any extra chocolate drip off before placing the truffle back onto the parchment paper. For decoration, you can add a sprinkle of crushed Oreos, colorful sprinkles, or a drizzle of melted white chocolate. This not only makes them pretty but also adds extra flavor and texture.
If you want them to look extra professional, use two forks to roll them in chocolate so they stay round and smooth. Decorating is the fun part, so get creative. Each batch can look different depending on how you finish them.
Step 6: Chill and Serve
Once all the truffles are dipped and decorated, return the tray to the refrigerator for at least 30 minutes. This allows the chocolate coating to harden and set. After that, transfer them to a serving plate or airtight container. They are ready to enjoy right away, or you can store them for later.
Tips for the Best Truffles
- Always use regular Oreos. Double-stuffed cookies add too much filling and make the mixture too soft.
- Chill the truffle dough before dipping. Cold truffles hold their shape better when coated in chocolate.
- If the chocolate is too thick, add a teaspoon of coconut oil to thin it out.
- Use a fork or dipping tool for smooth chocolate coverage.
- Store in the refrigerator to keep them firm and fresh.
Variations
- Use golden Oreos for a vanilla version.
- Try peanut butter Oreos for a sweet and nutty twist.
- Dip in dark chocolate for a bold flavor.
- Roll in cocoa powder, shredded coconut, or powdered sugar instead of dipping.
- Add crushed peppermint candies for a festive holiday version.
Serving Ideas
Oreo Truffles are versatile when it comes to presentation. You can serve them at parties, place them in candy boxes for gifts, or even add them to dessert platters. For a classy touch, place each truffle in a mini cupcake liner. This keeps them neat and makes them look like something you would buy at a bakery.
If you are making them for the holidays, decorate with colored sprinkles to match the season. For birthdays, drizzle them with bright candy melts. They also look beautiful stacked on a tiered dessert stand.
Another fun idea is to create a mix-and-match tray with different flavors of truffles. For example, make some with golden Oreos, some dipped in dark chocolate, and some decorated with white chocolate drizzle. This gives guests variety and makes your dessert table more exciting.
FAQs
1. Do I need to refrigerate Oreo Truffles?
Yes. Because they contain cream cheese, Oreo Truffles should be stored in the refrigerator.
2. Can I make them ahead of time?
Yes, they keep well in the fridge for up to two weeks, or you can freeze them for up to two months.
3. Can I use flavored Oreos?
You can, but the flavor will change. Golden Oreos, peanut butter Oreos, or mint Oreos are popular options.
4. How do I keep the chocolate coating smooth?
Chill the truffles before dipping and let excess chocolate drip off. Use good-quality chocolate for the best results.
5. Can I use low-fat cream cheese?
Full-fat cream cheese is best for texture, but low-fat will still work. The mixture may be slightly softer.
6. Can I freeze Oreo Truffles?
Yes, place them in an airtight container and freeze for up to 2 months. Thaw in the fridge before serving.
7. What type of chocolate is best for dipping?
Semi-sweet chocolate is most common, but you can use milk or dark depending on your taste. White chocolate also works well.
Final Thoughts
Making Oreo Truffles at home is fun, simple, and rewarding. With only a few ingredients you can create a dessert that looks elegant and tastes amazing. They are great for holidays, birthdays, or even as an everyday treat. I like making a big batch, keeping some in the fridge, and freezing the rest for later.
If you enjoy Oreo desserts, this recipe will become one of your favorites. Once you taste these, you will see why they are always the first treat to disappear at gatherings.
